Masterful Bread Baking: Top Tips for Perfect Loaves
Bread baking is an art form that has been practiced for thousands of years, evolving from simple flatbreads to the complex, flavorful loaves we enjoy today. Whether you’re a novice baker or a seasoned professional, the quest for the perfect loaf is a rewarding journey. This article will delve into the essential tips and techniques for mastering bread baking, ensuring that every loaf you bake is a masterpiece.
Understanding the Basics
Creating the perfect loaf begins with understanding the basic principles of bread baking. At its core, bread is a simple combination of flour, water, yeast, and salt. However, the magic lies in how these ingredients interact and transform through the process of fermentation.
Choosing the Right Flour
Flour is the foundation of any bread, and selecting the right type is critical. For most bread recipes, you’ll want to use bread flour, which has a higher protein content compared to all-purpose flour. This higher protein content helps develop gluten, the network of proteins that gives bread its structure and chewiness. Whole wheat flour, rye flour, and other specialty flours can add flavor and nutrition but generally require adjustments in hydration and fermentation time.
The Role of Yeast
Yeast is the leavening agent that ferments the dough, producing carbon dioxide and causing it to rise. There are two main types of yeast: active dry yeast and instant yeast. Active dry yeast requires proofing in warm water before use, while instant yeast can be mixed directly with the flour. Some bakers prefer using a sourdough starter, a natural leavening agent that adds complex flavors and improves the bread’s shelf life.
Water: The Catalyst
Water binds the flour and yeast together, facilitating the development of gluten. The amount of water in your recipe determines the dough’s hydration level. Higher hydration doughs result in a more open crumb and a crusty exterior, while lower hydration doughs produce a tighter crumb and softer crust. The temperature of the water also affects fermentation; warmer water speeds up the process, while cooler water slows it down.
Salt: Enhancing Flavor and Structure
Salt is crucial in bread baking for its ability to enhance flavor and strengthen gluten. It also regulates yeast activity, preventing the dough from rising too quickly. While some bakers prefer unsalted bread, a small amount of salt is generally recommended for both taste and texture.
Mastering the Techniques
Once you’ve familiarized yourself with the basic ingredients, it’s time to hone your technique. Each step in the bread-making process plays a vital role in achieving the perfect loaf.
Kneading: Developing Gluten
Kneading is the process of working the dough to develop gluten, the protein network that gives bread its structure. Proper kneading ensures that the gluten is well-developed, resulting in a loaf that rises evenly and has a chewy, resilient crumb. Kneading can be done by hand or with a stand mixer using a dough hook attachment. The goal is to achieve a smooth, elastic dough that passes the “windowpane test” — when a small piece of dough can be stretched thin enough to become translucent without tearing.
Fermentation: The Art of Patience
Fermentation is where the magic happens. During this stage, yeast ferments the sugars in the flour, producing carbon dioxide and causing the dough to rise. This process not only leavens the bread but also develops flavor and texture. Understanding fermentation involves recognizing when the dough has doubled in size and achieved optimal flavor. This can take anywhere from a few hours to overnight, depending on the temperature and ingredients.
Shaping: Crafting the Loaf
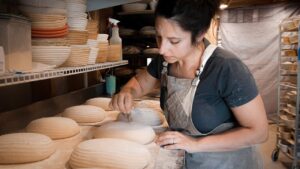
Once the dough has risen, it’s time to shape it. Proper shaping contributes to an even crumb and prevents large air pockets from forming. There are various shapes to choose from, including boules, batards, and baguettes. Each shape requires different techniques, but the goal is to create surface tension and an even distribution of dough.
Proofing: The Final Rise
After shaping, the dough undergoes a final rise, known as proofing. During this stage, the dough should expand to near its final volume. It’s crucial to proof the dough at the right temperature and for the correct duration to avoid over-proofing, which can lead to a flat, dense loaf. The “poke test” is a simple way to check if the dough is ready: gently press a fingertip into the dough, and if it springs back slowly, it’s ready to bake.
Perfecting the Bake
Baking is the culmination of all your efforts, where precise timing and temperature are key to achieving the perfect crust and crumb.
Preheating and Steaming
A hot oven is essential for bread to rise properly and develop a crispy crust. Preheat your oven to the specified temperature, usually between 425°F to 475°F (220°C to 245°C), for at least 30 minutes before baking. Adding steam during the first few minutes of baking helps create a glossy, crackly crust. This can be done by placing a pan of water in the oven or using a spray bottle to mist the dough.
Monitoring the Bake
Keep a close eye on your bread as it bakes to ensure even cooking. Most loaves are done when they sound hollow when tapped on the bottom and have an internal temperature of around 200°F (93°C). If the crust is browning too quickly, cover the loaf with aluminum foil to prevent burning.
Cooling: Letting the Bread Rest
Once the bread is baked, it’s essential to let it cool on a wire rack. This allows the steam to escape, preventing a soggy crust and ensuring that the crumb sets properly. Resist the temptation to slice the bread immediately; cooling enhances the flavor and texture.
Experimenting with Flavors
Once you’ve mastered the basics, the world of bread baking opens up to endless possibilities for creativity and flavor experimentation.
Incorporating Add-ins
Enhance your bread with a variety of add-ins, such as nuts, seeds, dried fruits, or herbs. These ingredients can be mixed into the dough during kneading or sprinkled on top before baking. Consider the flavors and textures you want to achieve and how they complement the bread’s base ingredients.
Exploring Different Flour Blends
Experiment with different types of flour to create unique flavors and textures. Whole grain flours like spelt, rye, and einkorn add depth and nutrition, while specialty flours like chickpea or buckwheat can introduce new flavors. When using alternative flours, adjust hydration and fermentation times accordingly, as they may affect gluten development.
Playing with Fermentation
Experimenting with fermentation can lead to exciting discoveries in flavor and texture. Try using a sourdough starter or experimenting with extended fermentation times for a more complex taste profile. Adjusting the fermentation temperature can also influence the final flavor; cooler temperatures often result in a tangier loaf.
Conclusion
Mastering bread baking is a journey of patience, practice, and creativity. By understanding the fundamental principles and techniques, you can consistently produce perfect loaves that are both delicious and rewarding. Whether you’re baking a simple white loaf or an intricate artisan bread, these tips will guide you toward becoming a masterful bread baker. Embrace the process, experiment with new flavors, and savor the satisfaction of creating beautiful loaves from scratch.
#ChatGPT assisted in the creation of this article.