
Bread baking is a timeless culinary art that has been practiced for centuries. As a beginner, diving into the world of bread baking can be both exciting and intimidating. However, with the right guidance, you can master the basics and create delicious homemade bread that will impress your family and friends. This article aims to provide you with easy steps that will set you on the path to becoming a successful bread baker.
Understanding the Basics
Before you start baking, it’s important to familiarize yourself with the basic ingredients and tools needed for bread baking. The four essential ingredients are flour, water, yeast, and salt. Understanding how these ingredients interact is crucial to your success.
Flour
The type of flour you use will greatly affect the texture and flavor of your bread. For beginners, all-purpose flour or bread flour is recommended. Bread flour has a higher protein content, which results in better gluten development and gives the bread a chewy texture.
Water
Water is the binding agent that helps form the dough. The temperature of the water can affect yeast activity—warm water (about 110°F) promotes yeast activity, while water that is too hot can kill the yeast.
Yeast
Yeast is a living organism that ferments the dough, causing it to rise. For beginners, active dry yeast or instant yeast are the most convenient options. Always check the expiration date on your yeast package to ensure it’s active.
Salt
Salt not only adds flavor to the bread but also regulates yeast activity and strengthens the gluten structure. Be cautious not to let salt come into direct contact with the yeast, as it can inhibit yeast activity.
Essential Tools for Bread Baking
While it’s possible to bake bread with minimal equipment, having the right tools can make the process smoother and more enjoyable.
Mixing Bowl
A large mixing bowl is essential for combining your ingredients and kneading the dough.
Wooden Spoon or Dough Scraper
These tools are useful for mixing and handling the dough.
Kitchen Scale
Measuring ingredients by weight rather than volume ensures accuracy and consistency in your bread baking.
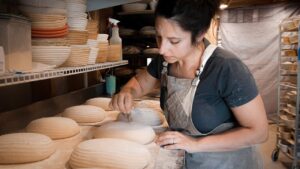
Proofing Basket or Bowl
A proofing basket or a lightly greased bowl is needed to allow your dough to rise properly.
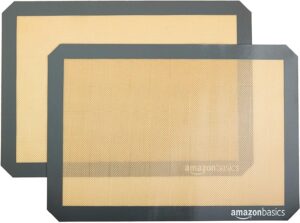
Baking Stone or Baking Sheet
A baking stone helps create a crisp crust, but a baking sheet will also work for beginners.
Step-by-Step Guide to Baking Your First Bread
Now that you’re familiar with the basics, let’s dive into a simple step-by-step process to bake your first loaf of bread.
Step 1: Gather Your Ingredients
For a basic loaf, you’ll need:
– 3 1/2 cups (500g) of bread flour
– 1 1/4 cups (300ml) of warm water
– 2 teaspoons (7g) of active dry or instant yeast
– 2 teaspoons (10g) of salt
Step 2: Activate the Yeast
If using active dry yeast, dissolve it in warm water and let it sit for about 5-10 minutes until it becomes frothy. This step is not necessary for instant yeast.
Step 3: Mix the Dough
In a large mixing bowl, combine the flour and salt. Add the water and yeast mixture (or water and instant yeast) to the flour. Use a wooden spoon or your hands to mix until a sticky dough forms.
Step 4: Knead the Dough
Transfer the dough to a lightly floured surface and knead it for about 10 minutes. The dough should be smooth and elastic. If it’s too sticky, add a little more flour; if it’s too dry, add a splash of water.
Step 5: First Rise (Bulk Fermentation)
Place the dough in a lightly greased bowl, cover it with a damp cloth or plastic wrap, and let it rise in a warm, draft-free area for 1-2 hours, or until it has doubled in size.
Step 6: Shape the Dough
Once the dough has risen, gently deflate it and transfer it to a lightly floured surface. Shape it into a loaf by folding the edges into the center and rolling it into a tight cylinder.
Step 7: Second Rise (Proofing)
Place the shaped dough seam-side down in a proofing basket or on a parchment-lined baking sheet. Cover it and let it rise for another 30-60 minutes until it has puffed up slightly.
Step 8: Preheat the Oven
Preheat your oven to 475°F (245°C). If using a baking stone, place it in the oven to heat up as well.
Step 9: Score and Bake
Just before baking, use a sharp knife or razor blade to make a shallow slash on the surface of the dough. This allows the bread to expand in the oven. Transfer the dough to the preheated baking stone or sheet and bake for 25-30 minutes, or until the crust is golden brown and the loaf sounds hollow when tapped.
Step 10: Cool and Enjoy
Remove the bread from the oven and let it cool on a wire rack for at least 30 minutes before slicing. This allows the interior to set properly.
Troubleshooting Common Issues
As a beginner, you might encounter some challenges. Here are a few common issues and their solutions:
Dense Bread
If your bread turns out too dense, it might be due to insufficient kneading or not allowing enough time for the dough to rise. Ensure proper kneading and give the dough enough time to double in size during fermentation.
Flat Loaf
A flat loaf can result from over-proofing, which means the dough rose too much before baking. Make sure not to let the dough rise beyond doubling its size during the second rise.
Cracked Crust
If the crust cracks, it could be due to insufficient steam in the oven. Place a small pan of water in the oven during baking to create steam, which helps develop a smooth crust.
Conclusion
Bread baking is a rewarding and fulfilling skill that anyone can master with practice and patience. By understanding the basic ingredients, tools, and techniques, you’ll be well on your way to baking delicious homemade bread. Remember, the key to success is to keep experimenting and learning from each bake. Soon enough, you’ll be creating loaves that not only taste amazing but also fill your home with the comforting aroma of freshly baked bread. Happy baking!
#ChatGPT assisted in the creation of this article.