
There’s something truly magical about the aroma of freshly baked bread wafting through your home. For centuries, bread has been a staple in many cultures, and mastering the art of creating the perfect crusty loaf is both a rewarding and delicious endeavor. In this article, we’ll explore the secrets of crafting a crusty bread that boasts a crisp, golden exterior and a soft, chewy interior. Whether you’re a seasoned baker or a beginner, our expert recipe will guide you through every step of the process.
The Science Behind Crusty Bread
Understanding the science behind bread baking is crucial to mastering a crusty loaf. The crust is formed through a process known as the Maillard reaction, where amino acids and sugars in the dough react under high heat, resulting in the brown color and complex flavors. Additionally, steam plays a vital role in this process by keeping the dough’s surface moist during the initial baking phase, allowing it to expand before forming a hardened crust.
Essential Ingredients
Quality ingredients are the foundation of any great bread. Here’s what you’ll need:
- Flour: Bread flour is ideal due to its high protein content, which provides the gluten structure necessary for a chewy crumb.
- Water: Use filtered or spring water to avoid any off-flavors from tap water.
- Yeast: Active dry yeast or instant yeast works well, providing the necessary lift for fermentation.
- Salt: Enhances flavor and strengthens the dough’s gluten structure.
Tools of the Trade
While you don’t need a commercial bakery setup, investing in a few key tools will elevate your bread-making experience:
- Mixing bowls: A set of large bowls for mixing and proofing your dough.
- Bench scraper: Handy for dividing and shaping the dough.
- Baking stone or steel: Provides an evenly distributed heat source for a better crust.
- Dutch oven: Traps steam for a professional bakery-style crust.
- Lame or sharp knife: For scoring the dough before baking.
Step-by-Step Recipe for Crusty Bread
1. Prepare Your Ingredients
Measure out your ingredients carefully. For accuracy, consider using a digital scale. Here’s a simple formula to get started:
- 500g bread flour
- 350g water (room temperature)
- 10g salt
- 2g active dry yeast
2. Mixing the Dough
In a large mixing bowl, combine the flour, yeast, and salt. Gradually add water while mixing with a wooden spoon or your hands until a rough dough forms. Cover the bowl with a damp cloth or plastic wrap and let it rest for 30 minutes. This process is known as autolyse, which allows the flour to fully hydrate and the gluten to begin developing.
3. Kneading and Folding
After the initial rest, it’s time to develop the dough’s gluten structure. Use a method called “stretch and fold.” Wet your hands to prevent sticking, then gently stretch the dough up and fold it over itself. Rotate the bowl slightly and repeat. Perform this technique 3-4 times, every 30 minutes, over a period of 2 hours.
4. Bulk Fermentation
Once the dough has been sufficiently folded, cover it again and let it rise at room temperature until it doubles in size. This typically takes about 2-3 hours, depending on room temperature. For a more complex flavor, you can extend this process by refrigerating the dough overnight.
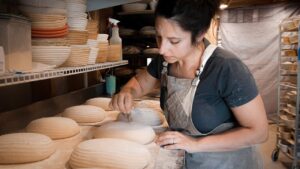
5. Shaping the Dough
After the bulk fermentation, gently turn the dough onto a lightly floured surface. Use your bench scraper to divide the dough if making multiple loaves. Gently shape the dough into a round or oval loaf, taking care not to deflate it. Allow it to rest for 20 minutes.
6. Final Proofing
Transfer the shaped loaf to a proofing basket or a floured towel-lined bowl. Cover and let it proof for another 1-2 hours, or until it has visibly puffed up.
7. Preheat the Oven
About 45 minutes before baking, preheat your oven to 475°F (245°C). If using a Dutch oven, place it in the oven to preheat as well. This will mimic a professional steam oven and help achieve the perfect crust.
8. Scoring and Baking
Once your dough is ready, carefully remove the preheated Dutch oven. Gently invert the dough onto a piece of parchment paper. Use a lame or sharp knife to score the top of the loaf. This allows the bread to expand properly in the oven. Place the dough, with the parchment paper, into the Dutch oven. Cover with the lid and bake for 20 minutes. Remove the lid and bake for an additional 25 minutes, or until the crust is deep golden brown.
9. Cooling and Enjoyment
Once baked, remove the bread from the oven and allow it to cool on a wire rack. Cooling is an essential step, as it allows the interior to set properly. Resist the temptation to cut into the bread immediately. After cooling, enjoy your homemade crusty bread with a pat of butter, a drizzle of olive oil, or simply on its own.
Tips for Success
– Experiment with different flours, hydration levels, and fermentation times to find what works best for your palate.
– Maintain a consistent room temperature for proofing to control fermentation speed.
– Practice patience; artisan bread baking is an art that improves with experience.
Conclusion
Mastering the art of crusty bread is a fulfilling experience that combines science, patience, and creativity. With practice and attention to detail, you can create bakery-quality loaves right at home. Whether you’re baking for yourself or to share with loved ones, the process of crafting the perfect crusty bread is as enjoyable as the result. So, gather your ingredients, preheat your oven, and start your journey to becoming a master bread baker today!
#ChatGPT assisted in the creation of this article.