
There’s an undeniable charm in the simplicity of a well-made loaf of white bread. The aroma that fills the kitchen, the crispness of the crust, and the soft, airy crumb all contribute to an experience that is both comforting and indulgent. Whether you’re a seasoned baker or a novice, creating the ultimate white bread with an artisan touch is a rewarding endeavor. In this article, we’ll guide you through an easy, step-by-step recipe that promises artisanal perfection with every loaf.
The Art of Artisan Baking
Artisan baking is all about attention to detail and using quality ingredients. It emphasizes traditional techniques and a hands-on approach that transforms simple components into something extraordinary. The ultimate white bread is no exception, relying on fundamental elements like flour, water, yeast, and salt. Despite its simplicity, achieving the perfect loaf requires precision, patience, and a bit of practice.
The Importance of Ingredients
When it comes to artisan baking, the quality of your ingredients plays a crucial role in the final product. Choose unbleached, high-protein bread flour for a robust structure and chewy texture. Fresh, active dry yeast ensures a good rise, while filtered water and sea salt enhance the bread’s flavor profile. Remember, each component contributes to the bread’s overall character, so prioritize quality over quantity.
The Role of Technique
In artisan baking, technique is just as important as ingredients. Techniques such as autolyse, folding, and proper fermentation are essential to developing gluten, enhancing flavor, and achieving the perfect crust and crumb. Understanding and mastering these methods will elevate your white bread from ordinary to extraordinary.
Ultimate White Bread Recipe
Ingredients
- 500g (about 4 cups) unbleached bread flour
- 325ml (about 1 1/3 cups) lukewarm water
- 10g (about 1 1/2 teaspoons) sea salt
- 7g (about 2 1/4 teaspoons) active dry yeast
Instructions
Step 1: Activate the Yeast
In a small bowl, dissolve the yeast in 50ml of the lukewarm water. Let it sit for about 5-10 minutes until it becomes frothy. This indicates that the yeast is active and ready to use.
Step 2: Autolyse
In a large mixing bowl, combine the flour and the remaining water. Mix until no dry flour remains. Cover the bowl with a damp cloth and let it rest for 30 minutes. This process, known as autolyse, allows the flour to fully hydrate, which will improve gluten development and the dough’s extensibility.
Step 3: Mix the Dough
After the autolyse, add the activated yeast mixture and salt to the dough. Using your hands or a dough scraper, mix until all ingredients are thoroughly combined. The dough will be sticky, but that’s perfectly normal.
Step 4: First Fermentation
Cover the bowl with a damp cloth or plastic wrap and let the dough ferment at room temperature for about 1-2 hours. During this time, perform a series of four stretch-and-folds every 30 minutes. This technique strengthens the gluten network and helps incorporate air into the dough.
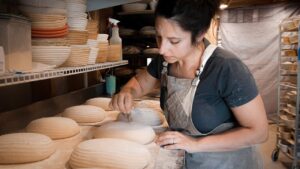
Step 5: Shape the Dough
Once the dough has doubled in size, transfer it to a lightly floured surface. Gently deflate it and shape it into a tight ball or loaf. Be careful not to overwork the dough, as this can result in a dense crumb.
Step 6: Second Fermentation
Place the shaped dough seam-side up in a well-floured banneton or a bowl lined with a floured kitchen towel. Cover it and let it proof for another 1-2 hours, or until it has visibly expanded and holds an indentation when gently poked with a fingertip.
Step 7: Preheat and Bake
Preheat your oven to 230°C (450°F) with a Dutch oven inside. Once preheated, carefully transfer the dough onto a piece of parchment paper. Score the top with a sharp blade to allow for controlled expansion during baking. Carefully place the dough into the preheated Dutch oven, cover, and bake for 20 minutes. Then, remove the lid and continue baking for another 20-25 minutes, or until the crust is deeply golden brown and sounds hollow when tapped.
Step 8: Cool and Enjoy
Remove the bread from the Dutch oven and let it cool on a wire rack for at least an hour before slicing. This allows the crumb to set properly and enhances the bread’s flavor.
Tips for Success
- Temperature Control: Maintain consistent room temperature for fermentation. If it’s too warm, the dough may overproof; if too cool, it may take longer to rise.
- Practice Patience: Artisan baking is a slow process. Give the dough time to develop flavor and structure through extended fermentation.
- Experiment with Scoring: Scoring is both functional and artistic. Experiment with different patterns to give your bread a unique look.
- Listen to Your Dough: Every dough behaves differently. Pay attention to its texture, elasticity, and response to touch to guide your baking process.
Conclusion
Crafting the perfect white bread is a journey that combines art, science, and a dash of intuition. With this ultimate white bread recipe, you have the foundation to create a loaf that captures the essence of artisan baking. Embrace the process, enjoy the tactile experience, and savor the satisfaction of pulling a beautiful loaf from your oven. Happy baking!
#ChatGPT assisted in the creation of this article.